PNW Clamming Tips

They are the highlight of the famous PNW chowder and incredibly easy to collect on your own. I recently got into clamming here in Oregon and now I am hooked. On my first outing, I came back empty handed which was disappointing. After watching endless YouTube videos, reading posts from others in the area, and conducting local research while out, I found the best methods. Finally I have been bringing home enough to chop and freeze for later chowders and stews.
Let’s talk clams.

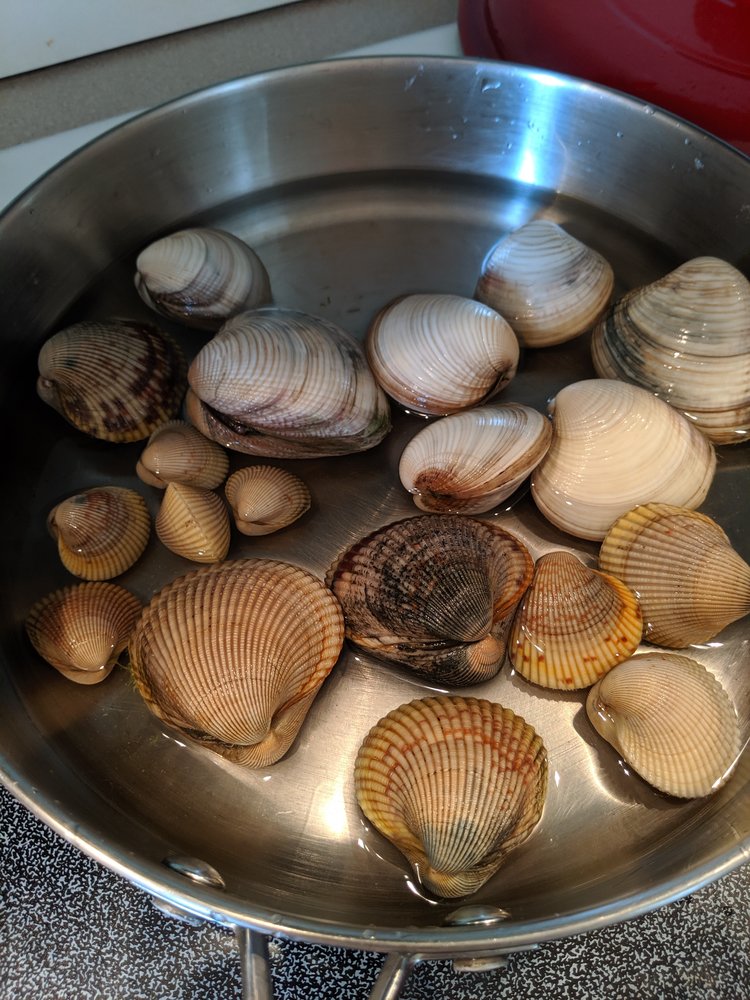
These are mostly butter clams with one cockle in the center of the bowl

Cockles come in a variety of sizes, but are usually smaller than the gaper and butter clams

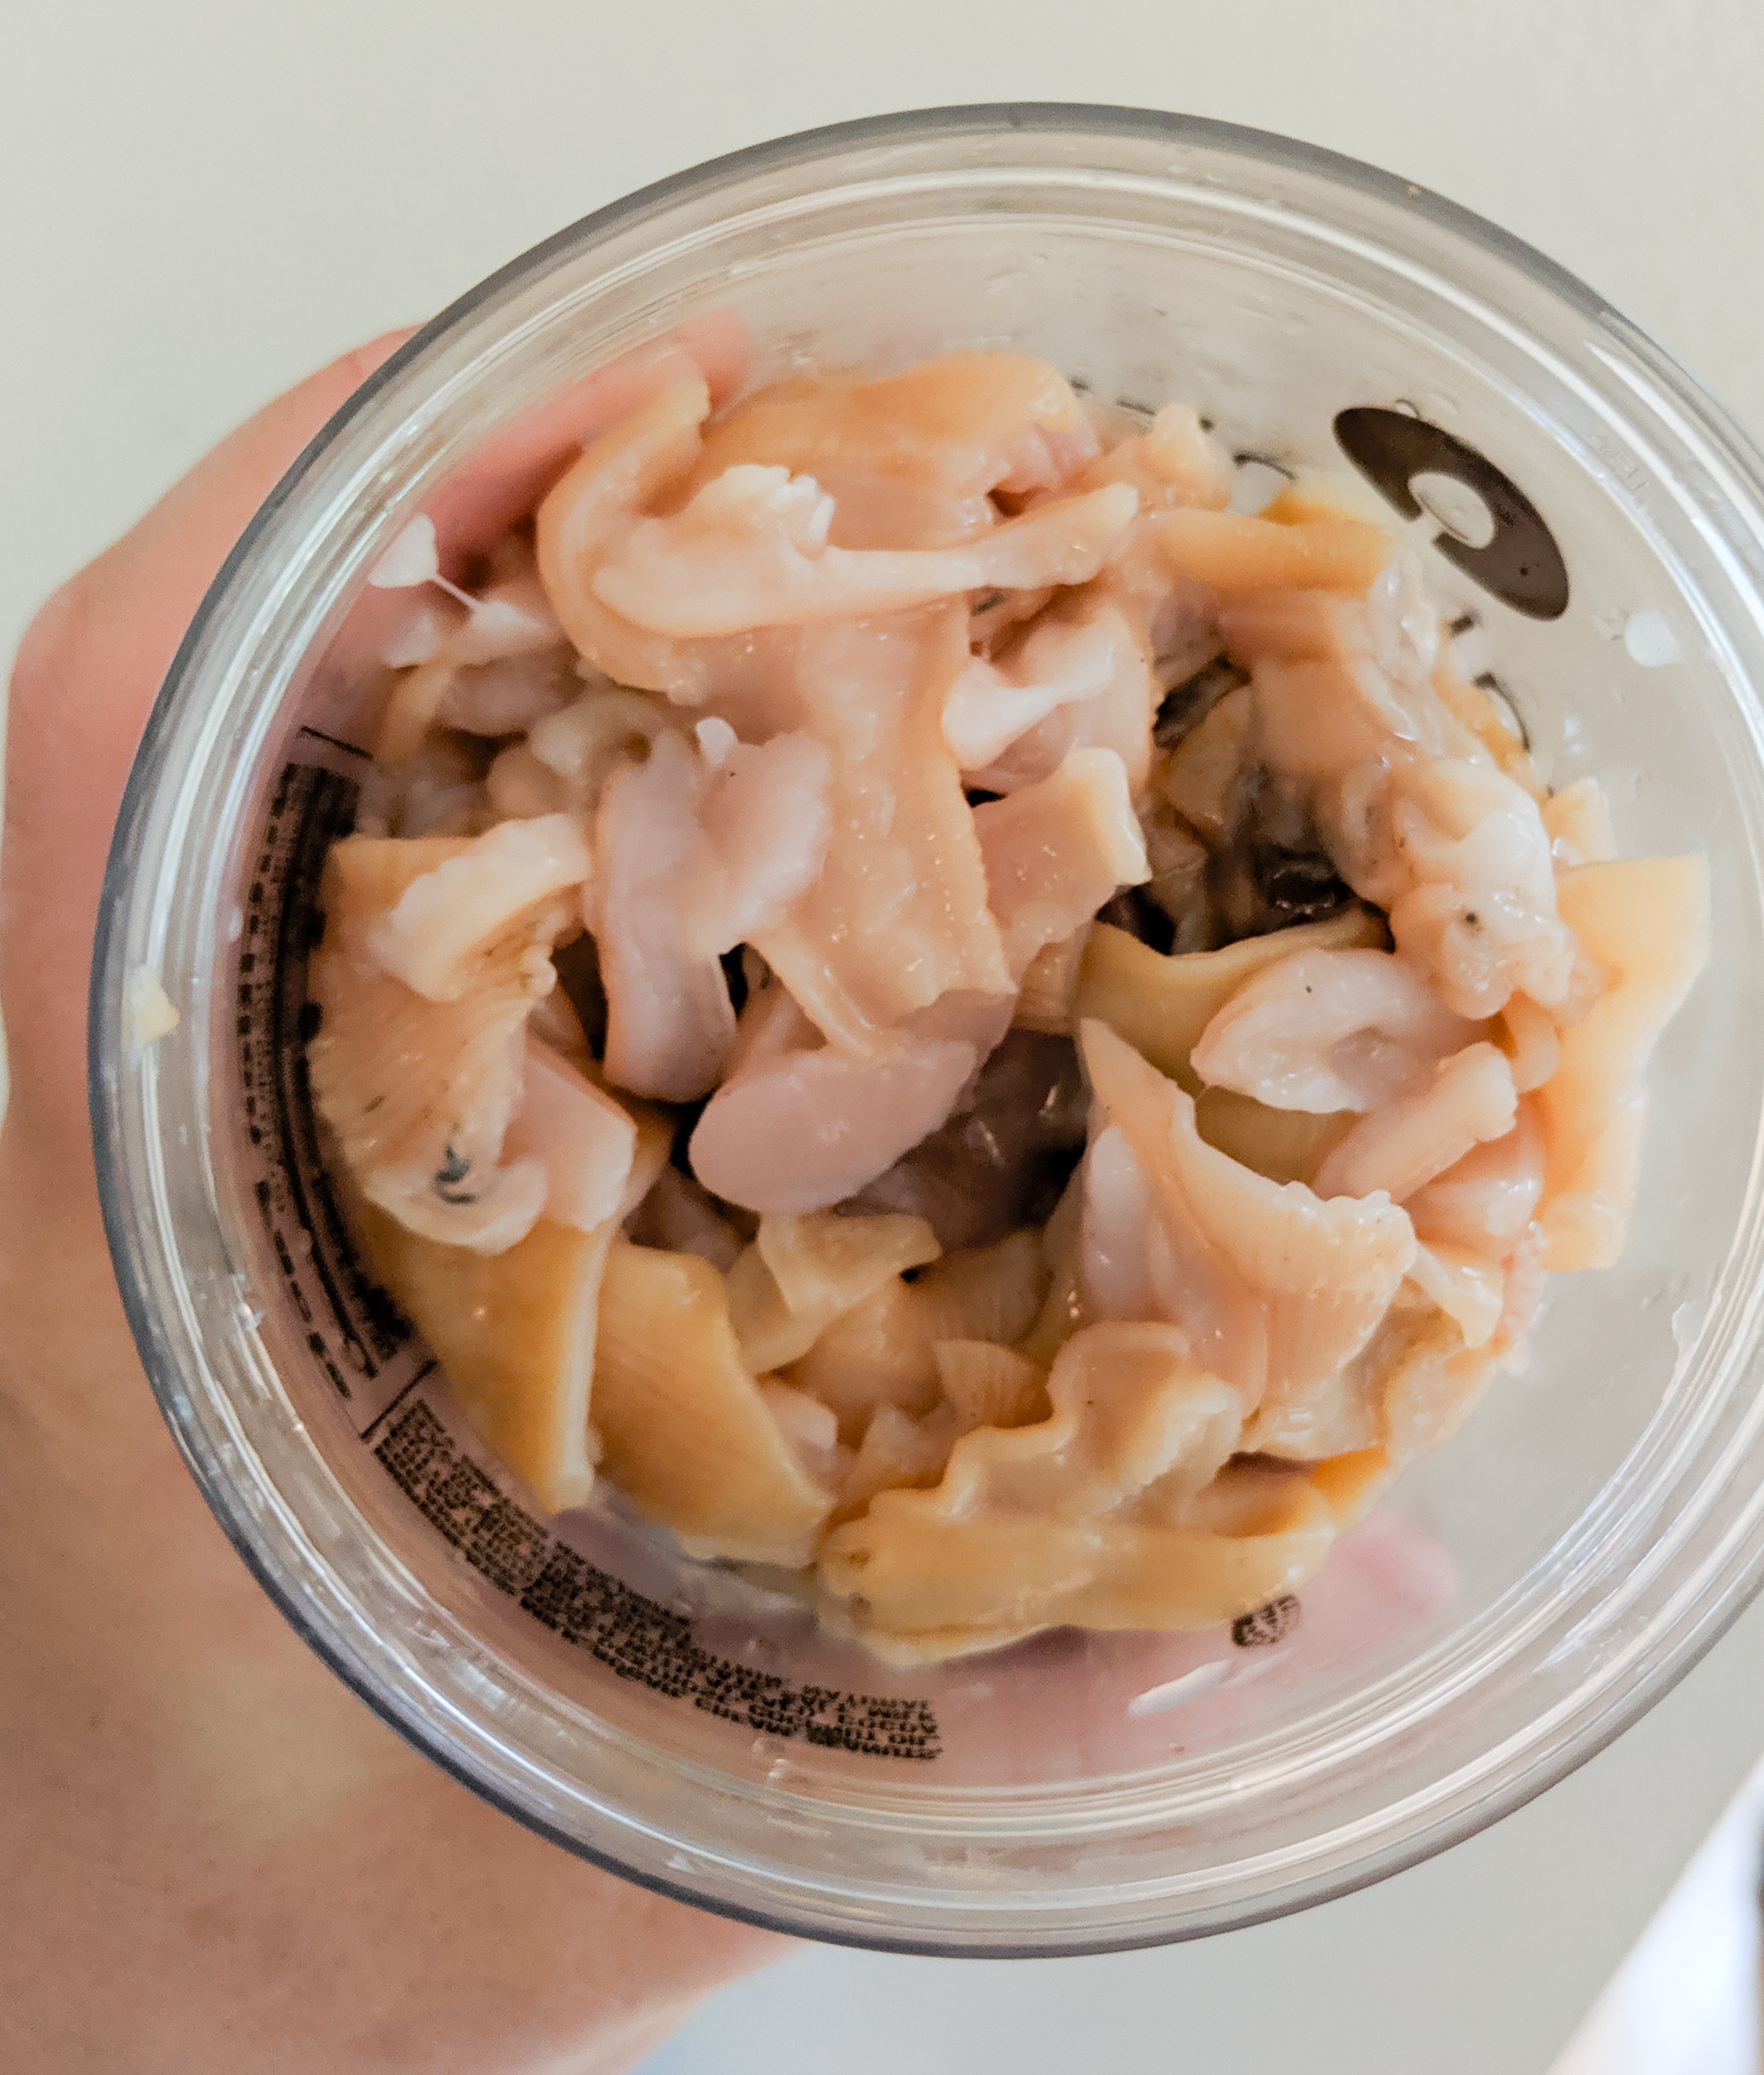
Freshly opened butter clam

Tides: Negative tides are what you want to watch for. This means that you can get further out and will have more time to work before the water comes back in. You can of course got out at any low tide, but you will most likely be the most successful planning your trip for the negative tides. You will also start noticing more people making their way out to clam at this time as well. Don’t worry, there are endless clam opportunities, so the sheer amount of people shouldn’t put you off. The space you will be working in is only a few feet.
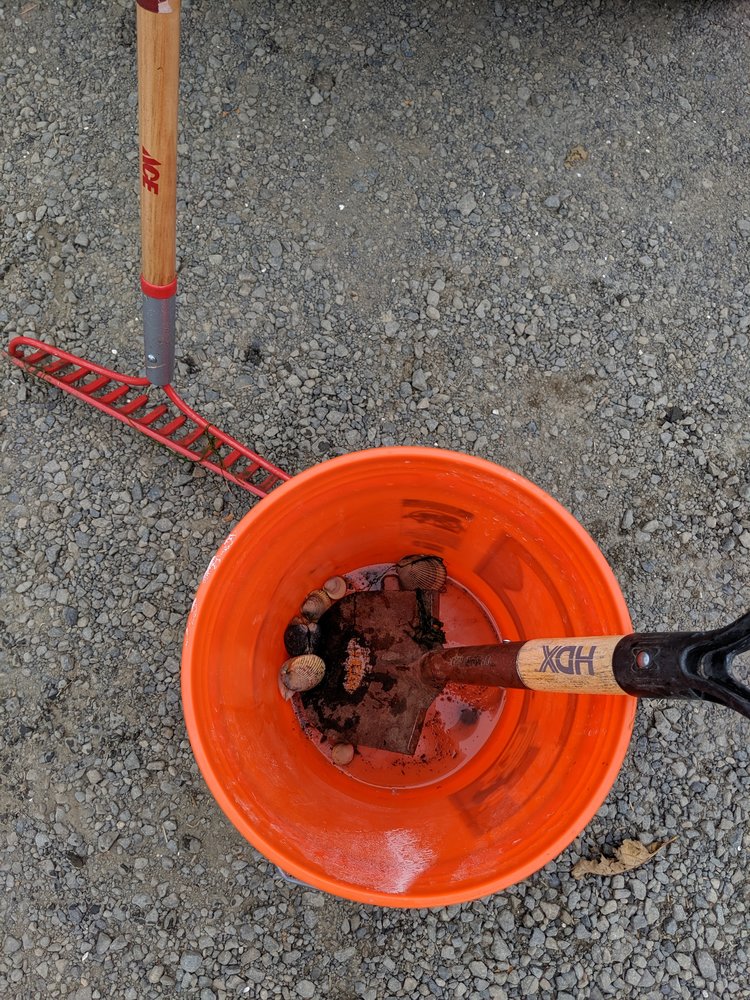
Tools: I went through the gamete of clamming tools to figure out harvesting of them. I started out with a large shovel which I was unsuccessful at first with. It was heavy, I didn’t dig deep enough and just didn’t generally know what I was doing with it. Next, I bought a clamming gun thinking this would be the ticket. I took my fancy gun to low tide at the bay and after poking away. Unfortunately, I also came home empty handed with this method too. After asking around, many had the best luck with a heavy duty rake. So, on the following trip, I threw in my heavy duty garden rake and I luckily hit on a few shells and threw them into my bucket. I came out with about 6 cockles that were near the surface before the tide came back in. They made a great, but small chowder. Lastly, I brought a small and handy shovel that I have for the garden. I watched the guys bringing out buckets of large butter clams and realized they were digging holes and feeling around. On my first solid dig, I found three palm size butter clams and boom—hooked. I came home with 18 clams with about 6 being the size of my hand.
There are many varieties of clams along the Oregon coast and they each have their own way to harvest. Below we will discuss the most popular here in the PNW:
Cockles: To harvest you will just need to run a heavy duty rake over the sand and scrape in about 2-3 inches. You can feel and hear the clink of the rake on the clam which makes it easy to just reach down and pick them up. These are best served steamed or in chowders due to their small size.
Butter and Gaper Clams: These will require a bit more work to harvest. They live about 12-24 inches under the sand, so you will need to dig for them. Netarts Bay, Oregon, is so saturated with them, you can pretty much dig anywhere and you will be able to reach in and pull them out. You can also see a ‘show’ which is a quarter size hole on the surface that lets you know there are these types of clams below. I have luck just picking a spot and carefully digging a hole down to where the water starts coming back in and swishing it around until I feel a hard shell along the sides. I make the hole wider by scooping out the sand walls until I feel like I can more onto a new area. Please do cover your holes back in when you move on, it is better for the environment and leaves the area less disturbed. These clams are generally the size of your palm. Just pull them out and transfer them to the bucket.
Razor Clams: I will start by saying I have not harvested these, but I do know they are popular here in the PNW. There are specific areas in which they live and it seems the gun might be the best tool. The shells crack easily and they move quickly, so you will have to be a fast digger to pull them up.
Cleaning: This is my least favorite part of clamming, but it has to be done. Once home, rinse off our fresh catch in the sink. You can either kill and clean them immediately, or cover them with a damp cloth and keep them in the fridge for a day. To kill, slide your sharp and flexible knife into the shell behind the foot that is out and slice the muscle behind it holding it to the shell. Do the same with the other side to pop open the shell. Slice out the stomach pouch and toss it. Cut the two chambered neck walls open to flatten. This is a very tough muscle, so you will want to flatten it with a meat tenderizing hammer before use.
Cooking: Finally, after all your hard work you have a big decision. You can either batter and fry them up whole fritter style or chop them down for a chowder. Once chopped, you can store them for future use in the freezer for 3-6 months. Give yourself extra room in the freezer bag or container because they will expand as they freeze from the water content. If you’re looking for a great chowder recipe, look no further Trail Forked has you covered: Forager Fresh Clam Chowder